
IKEA Kura bed with custom built loft play area and Safe Night Net.
This was such a fun project!!! My son is 6 years old and has autism. He is a major sensory seeker. He loves swinging, jumping, spinning, sand, playdoh, water, etc. I started this project just planning on making a generic sensory board, but somewhere along the way it clicked that his bedroom has a Star Wars theme and I could use a different texture that represents each character. With the help of my husband, the Star Wars expert, we spent the day browsing Hobby Lobby, Joann Fabrics, and Menards gathering materials. Here’s what we came up with!
To start I had to create the frame and backing. I used 1/4″ plywood for the back. The frame is made of 1x2s and 1x3s. These are the dimensions of the largest panel to give you an idea, but you can easily adjust it to fit your space.


I cut all the wood, spray painted it black, and then glued down the frame using wood glue.* Tip: Use a quick square ruler to make sure your panels are glued on straight. Once the glue was dry I flipped it over and screwed the frame into place.
*If you plan on doing a panel with spinning beads (Princess Leia), you will need to drill the holes for the metal rods and put that together FIRST before it is all glued down.
Now on to the fun part:
HAN SOLO IN CARBONITE – Cement Hand Prints


I made a mold out of scrap wood slightly smaller than the panel – about 11-3/4″ x 8-1/2″. A 60 lb bag of dry cement mix at Menards (waaay more than you will need) is only $3.26. I mixed the dry cement mix with water according to directions, poured it in the mold, let it sit for about an hour, and it was ready for my kiddo to press his hands into it. Make sure you wash your hands really well after working with the cement. I let the cement dry for 3 days before I pulled it out of the mold. Then I used a wire brush and cleaned it under water to get out any loose dust and stone. I let it dry a few more days and then I sealed it with a clear acrylic spray paint. I used a generous amount of E-6000 multi-purpose industrial strength glue to glue the cement slab to the wood panel.
CHEWBACCA – Faux Fur

This was quite easy. I just cut the fur to the size of the panel, shook off any extra loose fur, and used Loctite spray adhesive on the back. Make sure to cover and protect the edges/sides of the fur before you spray the glue. If you are worried about it being pulled off by little hands, you can also use a staple gun.
C3PO – Gold Metal Chain

First I cut a scrap piece of 1/4″ plywood to the same size of the panel and spray painted it gold for the backing and glued it down with E-6000. Hobby Lobby sells this thick gold metal chain in their trim and ribbon section. I found a similar looking gold chain at Joann Fabrics, but it was plastic. I like the way real metal feels cold to the touch. I used a pair of bolt cutters to cut the chain to length and E-6000 glue.
R2D2 – White/Blue Flat Marbles
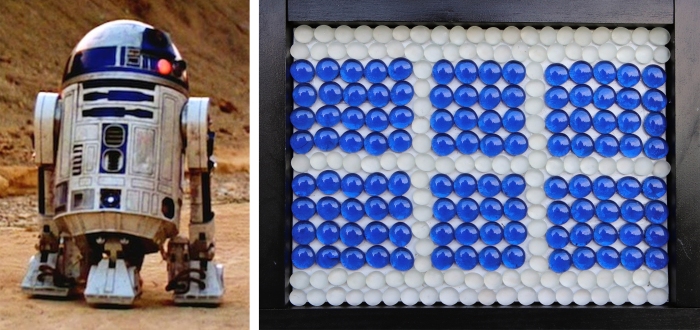
Similar to C3PO, I started out by cutting a scrap piece of 1/4″ plywood to the size of the panel, spray painted it white, and glued it down. I used frosted glass and glossy blue flat marbles and glued them down with E-6000 glue.
ROYAL GUARD – Red Fringe Trim

Working from the bottom – up I glued down lines of red fringe trim with E-6000 glue. It’s tedious, but creates a cool effect when it’s done!
DARTH VADER – Black Velvet


First I tried cutting black velvet to size and using Loctite Spray Adhesive. Fail. The fabric bubbled up. My second attempt worked much better. I cut a 1/4″ piece of scrap plywood to size and black velvet about an inch larger so that I could wrap it around and fasten it with hot glue on the backside. Then I glued the finished panel in place with E-6000 glue.
YODA – Green Suede

It is probably best to create this the same way I created Darth Vader’s black velvet panel, but I took the shortcut and used Loctite Spray Adhesive and that seemed to work alright.
MILLENNIUM FALCON – Metal Diamond Plate

I purchased a small sheet of craft metal diamond plate at Hobby Lobby. Using tinner’s snips, I cut the metal diamond plate to size and glued it down with E-6000 glue.
STORMTROOPER – White Tile

You can buy sheets of 12″ x 12″ tile at Menards. I cut it down to 8″ x 12″ and glued it in place with E-6000 glue.
LUKE SKYWALKER – Orange Silicone Placemat

This was the most challenging character for me to find a texture to match up with. My first idea was hot gluing orange squishy ear plugs down but found that to be too expensive. I found this orange silicone placemat on Amazon. I used Gorilla Super Glue Gel to glue it in place. Brush the glue so that it covers the entire backside of the mat otherwise, you will be able to see the glue spots.
OBI WAN KENOBI – Rope

I taped off the ends of the rope and hot glued it into place in a snaking pattern.
DARTH MAUL – Acrylic Rock Crystal

You can find these acrylic rock crystals in the floral section along with the flat marbles (vase fillers). I glued them down one by one with E-6000 glue. You should plan on this taking a ridiculously long time!
PRINCESS LEIA – White beads and shimmery paper

This was the most technically tricky panel to create. I found a cool glittery silver paper in the scrapbooking section at Hobby Lobby and used a spray adhesive to glue it down. Then I used 1/8″ metal rods drilled into the side of the panels/frame and strung cheap white plastic beads on. It was not easy attaching one side of the frame to the other side! It took me about 5 tries and a few choice words. Once the frame was glued down and dried, I screwed it in place.
QUEEN AMIDALA – Feather Boa

I used a staple gun to attach a 6ft feather boa to the panel. I am slightly concerned the feathers will get plucked off by little hands. An alternative might be black tinsel garland.
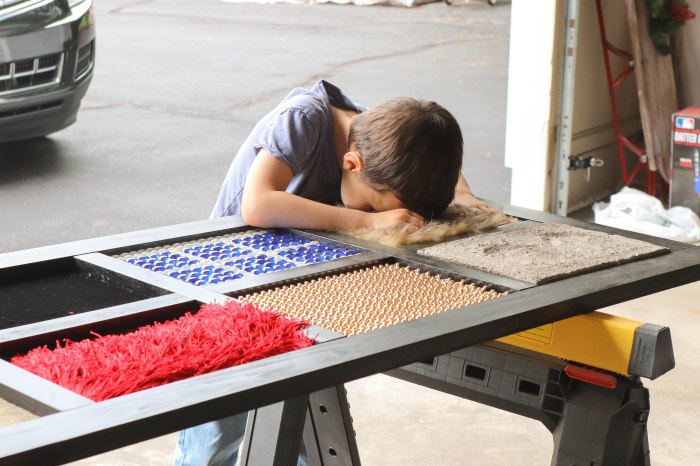
That’s it! My son was in love with it even before it was finished. His favorite is the furry Chewbacca panel.
When attaching the final product to the wall make sure you attach it directly to a stud for safety/security.
Can you think of any other panel ideas? Maybe brown and tan pom poms for Ewoks? Sandpaper for Tusken Raiders (Sand People)? Brown leather or crepe paper for Jabba the Hutt? Let me know in the comments! If you make your own sensory board I’d love to see your finished project and share on the blog! Please send photos to danalaureano@gmail.com.


One of the most creative DIY projects with a staple gun that we’ve ever seen. Great job!
LikeLike